Debugging Nx NestJS from VSCode
How to set up debugging an Nx NestJS project from VSCode. This debugs a running NestJS instance in attach mode.
This explains how to set up debugging an Nx NestJS project from VSCode.
It debugs a running NestJS instance in attach mode.
1. Create launch.json
Create a launch.json file from VSCode's Run and Debug > gear icon.
{
  "version": "0.2.0",
  "configurations": [
    {
      "type": "node",
      "request": "attach",
      "name": "Attach NestJS WS",
      "restart": true,
      "sourceMaps": true,
      "cwd": "${workspaceFolder}/server"
    }
  ]
}
The
serverin"cwd": "${workspaceFolder}/server"is
the name (folder name) of the NestJS project created with Nx, so change it as appropriate.
2. Start the NestJS project
In the VSCode terminal, run the following command.
nx serve server
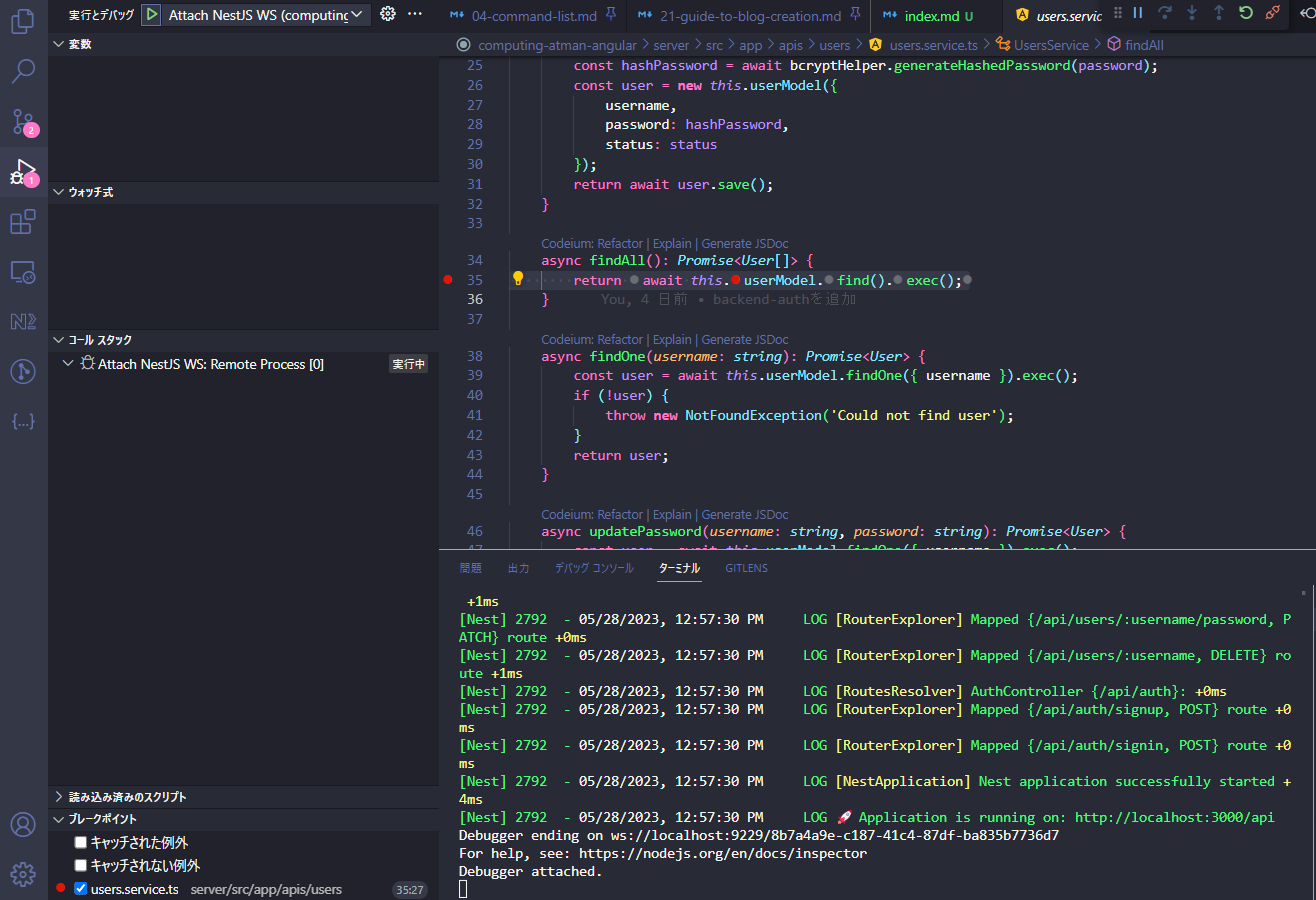
3. Start debugging
VSCode's Run and Debug > Start Debugging
Related plants
More Tech articles →Setting Up Nx Nestjs Mongodb Mongoose Integration - Part 3
Part 3 of Nx Nest.js GraphQL Integration - Install packages, update configs, generate GraphQL client for seamless integration. Enhance data management and scalability. Congrats on completing this guide to harmonious Nx, Nest.js, GraphQL integration! Stay tuned for more tutorials.
#nx#nestjs#mongodbSetting Up Nx Nestjs Mongodb Mongoose Integration - Part 2
Part 2 of Nx Nest.js MongoDB Mongoose Integration - Generate todos, create modules, implement GraphQL models, repositories, DTOs, and MongoDB schemas for enhanced application efficiency. Stay tuned for a comprehensive configuration guide.
#nx#nestjs#mongodbSetting Up Nx Nestjs Mongodb Mongoose Integration - Part 1
Guide to integrating Nx, Nest.js, MongoDB, and Mongoose for enhanced scalability and efficiency. Follow steps for seamless development.
#nx#nestjs#mongodb